Showing posts with label Crayons. Show all posts

Monday, November 24, 2014

Student Portfolios

The first project I do with my students each year is their Portfolios. We talk about how art can be functional and how the portfolio will function as something to hold all of their art in until they take it home.

I demonstrate on the board how to write using block letters. I stress the element of SPACE. I instruct students to write their names lightly with pencil and then trace the block letter around it so they do not run out of space. We also touch on line and shape.

Students color their portfolios and add personal touches. I try to keep them to the front so later on the early finishers can add more on other sides of their portfolios.

Examples!


Wednesday, April 23, 2014

6th Grade: Crayon Batik

I'm starting this project with one of my 6th grade classes this week! I'm going to have each student draw something that is a plant (flowers, leaves, trees, etc.). For my example, I drew The Tree of Gondor from The Lord of the Rings. This project has really great potential if students can follow directions well!

Step One: Plan out/draw the plant on a 12x12 piece of paper. I used white construction paper. The paper, of course, needs to be white in order for this to work!


Step Two: Color in the design. In order for this to work, you will need to press hard with your crayons to create thick, waxy layers. Anything that you want to make black, you should not color in - anything left "blank" will end up being black! For some reason, I wanted my tree to be white. I don't need to tell you why that was difficult!


Here is my completed coloring.


Step Three: Crinkle that paper! CAREFULLY! Otherwise it might rip on the edges. I've done it a few different ways.

  • Option 1: Crinkle and uncrinkle the paper around eight times.
  • Option 2: Crinkle the paper vertically, horizontally, diagonally, opposite-diagonally, etc.

    Basically, just crinkle it a lot.


Step Four: Smooth that paper out to prep for painting!


Step Five: Mix black tempera paint with a small amount of water and paint the entire paper with it! Crinkling the paper creates cracks in the waxy surface created by the crayons. The black paint mixture will fill in the cracks - batik! I really saturate the top to make sure I don't miss any spots.


Step Six: With a paper towel dab the excess paint off of the paper. Do not wipe it off! If you wipe it off, it will smear black paint all over your pretty picture! Dab, dab, DAB! There should be no pooling of paint by the time you are done dabbing.


Step Seven: Set your picture out to dry! You're done! Gaze with wonder at the beauty you've created!

Tuesday, May 7, 2013

Blue Dog: Kindergarten

This project is awesome!! I walked the kindergartners through a blue dog drawing step by step on a piece of blue paper. All we used were blue, white, and black crayons (and yellow for the eyes!).

There are so many paintings of blue dog! We looked at many different paintings. I then had students create their own, unique setting for their blue dog. I encouraged students to make the setting something special about themselves, i.e. a favorite place, where they are from, etc.

Here is one of my blue dogs:


Check out how talented my Kindergartners are!


The final project on display in the art room!


Monday, January 14, 2013

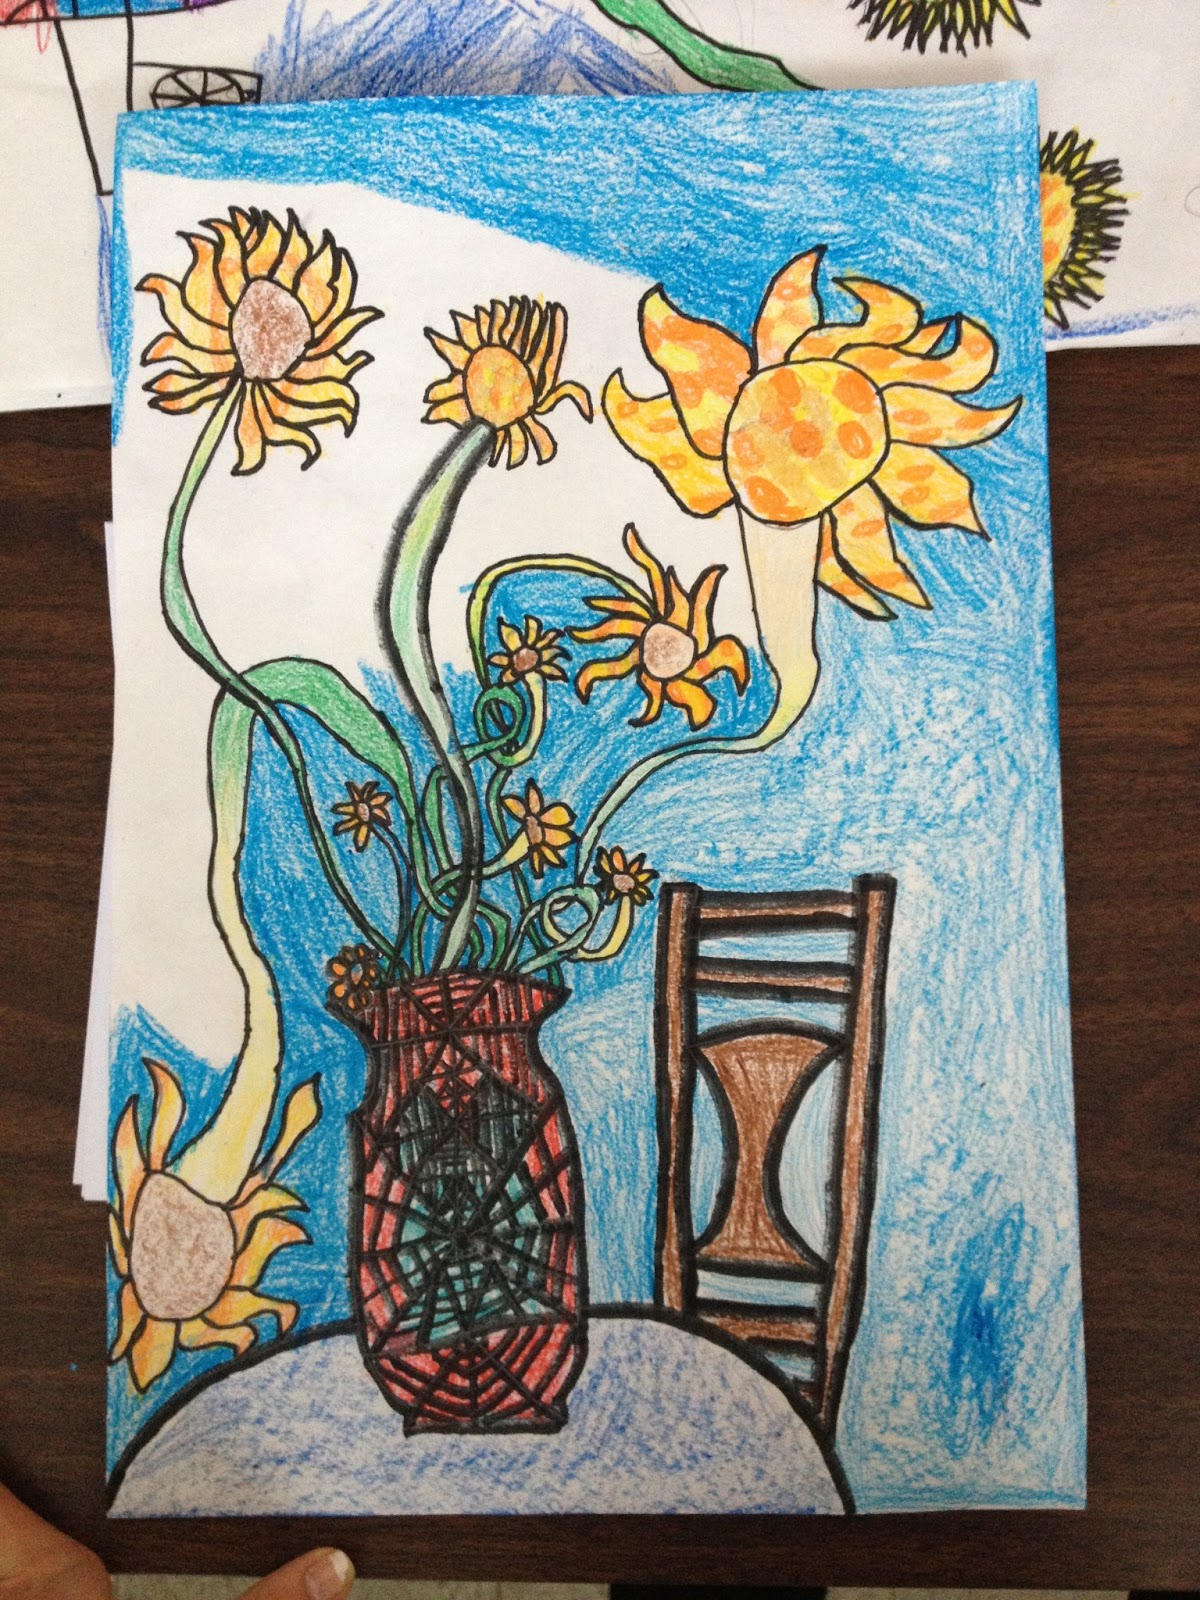
4th Grade Sunflowers in the style of Van Gogh

I attempted to teach a really awesome lesson on Vincent Van Gogh's sunflowers. I even showed a clip of Doctor Who's "Vincent and the Doctor" (which is pretty awesome, by the way). My students seemed really into it!!

...but...well, this lesson kind of flopped. I think my students got too bored with it. I was REALLY discouraged, but then a few students really pulled through! I mean, these sunflowers are gorgeous!!


I had asked the students to color in their pictures using dots only. I realized a little too late that the papers were a little big for that. It would have been easier (maybe) to use paint, but I only have this class for 25 minutes!! At my other school, I tried using paint and oil pastels, but the classes that used crayons honestly turned out much better than the other ones. Trial and error. I really like this first one (^) and how the white spaces make it look even more like Van Gogh's style!


Another one that turned out well! This student colored in, then added dots on top. A great approach really.


Many of my students decided to stop doing dots after the petals were done. I ended up having to grade these differently than I had originally planned. This lesson definitely needs some adjustment. Feel free to post any suggestions for future reference!

2nd Grade Dutch Cities

For a free draw before (while students were finishing up) I assigned students to draw a gingerbread house. I don't know if anyone else has noticed, but gingerbread houses look a lot like Dutch architecture! This is what inspired the Dutch City project.

I showed students pictures of Dutch buildings and talked about how their roofs looked, windows, etc. I also emphasized how close together the buildings are. They really seemed to like the buildings, especially after we connected them to gingerbread houses. After we finished the project, one of my students even brought in a picture of Dutch architecture which he tore out of a magazine. Hooray!


For the project, I cut 12x18 sheets of paper in half (6x18). This provided a long, skinny piece of paper. I had students use their pencils to draw buildings with crazy roofs, lots of windows, etc. with walls super close together. Students then traced their lines with permanent marker (not crayola marker!)

Students colored in their buildings however they liked with crayons. The only parts students were NOT to color in were the sky and the windows. I told students to press kind of hard with their crayons to make the colors smooth and bright.

Students used watercolor to finish these buildings! For the sky, students were to use both blue and purple. Some of the skies look pretty amazing! Students painted the windows in yellow.

With a class size of 36, it is hard to come up with a good project for 2nd grade!! I am very satisfied with how these turned out!


(Two students had to paint on a different day because they were not finished coloring!)


Thursday, November 8, 2012

More Kindergarten Shapes: Organic and Shape Family

Since I am at two schools with two different schedules, a lot of my classes finish projects at different times. I am sharing a few stand-outs from my kinders/1st graders projects on organic/free-form shapes and the shape family. The creativity contained within these children is always so astounding!


This student graded her own artwork, ha!


Monday, November 5, 2012

6th Grade Graphic Flowers (Georgia O'Keeffe)

My sixth graders created bright, expressive flowers! Here are the steps we took for each class.

Day 1: Observe Georgia O'Keeffe's flowers and practice drawing our own large flowers. I asked students to make their flowers so big that the petals ran off the page.

Day 2: Background time! I had students choose either warm or cool colors. Students drew circles inside of circles on a sheet of 12x14 paper for the background (reference the final results). Students then did a watercolor wash over the top of their background. If students used warm colors, than the color they chose was warm.

Day 3: Students drew large flowers and put different patterns inside the petals, leaves, etc.

Day 4: Students traced over their lines with oil pastels. With a smaller class, I would have had the students use oil pastels right away. Some of my students used crayons. The next time I do this lesson, I will have everyone use crayons. They just work so much better!

Day 5: Students used watercolor to make their flowers look awesome!

Day 6: Students cut out their flowers. Students folded strips of paper accordian style and glue them to the back of the flower and to the front of the background. This make the flowers POP off of the page. Voila!


Don't these look awesome!?

Thursday, November 1, 2012

Bare Trees with 1st Grade

I did a project with my 1st graders yesterday on Halloween. It was a really bad idea because they were completely crazy with thoughts of costumes, candy, and fun times. Luckily, they came to art class immediately after their fall party in the classroom. Seriously, my 1st graders were crazy-town yesterday! They finished the project in about five minutes. Not okay.

I searched Pinterest (yes, I finally gave in) for a quick, filler project and found this. I thought drawing trees would be a cute project even if none of them ended up looking like trees are supposed to.

Let me just say, my 1st graders blew me away!! These turned out so well!!

I drew a tree under the ELMO document reader using the letters "Y" and "V." I used crayons only; crayons are my favorite. Here is my example:


Here are the awesome trees made by my talented 1st grade students!


I'm so proud and impressed! I may have used this as a filler lesson, but I think now that I should develop it into a bigger lesson! These look so cool!!


blogger template by lovebird