Showing posts with label Art Teacher. Show all posts

Monday, November 24, 2014

5th Grade: Zentangle Animals

This is a project that takes a while, but if students will put the effort in always looks cool at the end!


First, we talk about drawing what we see, not what we think. We practice first with two drawings. One drawing I demonstrate with them, the second I have them do without my help. Students then pick out their own animal picture and apply what they've learned to drawing an animal. There are a lot of choices so they can pick something simple or complex! But they need to draw it the way it looks in the photo - drawing what they see!


This student did not get to add color to his (due to time contraints), but I thought it was a good example of the process. Photograph, draft, and final drawing!!


After students draw their animal, they split the entire drawing up into 6 or more sections. Each section will be filled in with a solid color of paint. After it's dry, students will begin adding patterns to each section. Below are the examples that were chosen to hang in the hallway.


3rd Grade: Line Sculpture

3rd grade gets to do a project that, in my opinion, facilitates a lot of creativity and helps with those problem solving skills! The line sculpture project! I cut a TON of papers into one-inch strips of paper (12 inches and 18 inches long). I give each student a little cardboard based to glue onto. Students basically have creative freedom, but I do tell students not to have papers going off the sides of the cardboard.

We start by talking about sculptures, how they are meant to be viewed from all sides, not just the front, what they can be made out of, etc. Then students get to start their sculptures. A lot of students think they look like roller coasters! Many times students will ask me how I did something and I tell them that I want for them to figure it out. If they are willing to try, they usually will figure it out! I love watching their minds at work.

The second/last day of the project, I introduce the last element they will add to their sculpture - emphasis! Each student will get ONE strip that has been painted on one side. The other side is up to them to decorate. It is the last piece they will glue to their sculptures and it needs to be somewhere that it will be easily noticed.

Here are some of the examples!


Students hard at work adding their emphasis pieces!


These projects always turn out looking so cool!!

Student Portfolios

The first project I do with my students each year is their Portfolios. We talk about how art can be functional and how the portfolio will function as something to hold all of their art in until they take it home.

I demonstrate on the board how to write using block letters. I stress the element of SPACE. I instruct students to write their names lightly with pencil and then trace the block letter around it so they do not run out of space. We also touch on line and shape.

Students color their portfolios and add personal touches. I try to keep them to the front so later on the early finishers can add more on other sides of their portfolios.

Examples!


Friday, August 22, 2014

Scratchboard: 2nd and 3rd grade


 Inspired by this framed artwork that's been in the hall forever, I came up with a copy-cat project for my second and third graders. Students drew an animal in an environment on a piece of tagboard. Students pressed hard with the crayon so it was smooth and every white space was filled in. I painted over the top with a mixture of black tempera paint and dish soap. Students scratched off the black in a pattern to reveal the pictures underneath.

I'm not sure why all of these are sideways, but I will fix it eventually!


Wednesday, April 23, 2014

6th Grade: Crayon Batik

I'm starting this project with one of my 6th grade classes this week! I'm going to have each student draw something that is a plant (flowers, leaves, trees, etc.). For my example, I drew The Tree of Gondor from The Lord of the Rings. This project has really great potential if students can follow directions well!

Step One: Plan out/draw the plant on a 12x12 piece of paper. I used white construction paper. The paper, of course, needs to be white in order for this to work!


Step Two: Color in the design. In order for this to work, you will need to press hard with your crayons to create thick, waxy layers. Anything that you want to make black, you should not color in - anything left "blank" will end up being black! For some reason, I wanted my tree to be white. I don't need to tell you why that was difficult!


Here is my completed coloring.


Step Three: Crinkle that paper! CAREFULLY! Otherwise it might rip on the edges. I've done it a few different ways.

  • Option 1: Crinkle and uncrinkle the paper around eight times.
  • Option 2: Crinkle the paper vertically, horizontally, diagonally, opposite-diagonally, etc.

    Basically, just crinkle it a lot.


Step Four: Smooth that paper out to prep for painting!


Step Five: Mix black tempera paint with a small amount of water and paint the entire paper with it! Crinkling the paper creates cracks in the waxy surface created by the crayons. The black paint mixture will fill in the cracks - batik! I really saturate the top to make sure I don't miss any spots.


Step Six: With a paper towel dab the excess paint off of the paper. Do not wipe it off! If you wipe it off, it will smear black paint all over your pretty picture! Dab, dab, DAB! There should be no pooling of paint by the time you are done dabbing.


Step Seven: Set your picture out to dry! You're done! Gaze with wonder at the beauty you've created!

Friday, March 14, 2014

3D Paper Relief: Radial Symmetry


This project is seriously the coolest! As a class, we discussed different kinds of symmetry with a focus on radial symmetry. With our limited amount of class time (only 30 minutes!) It's hard to do 3D projects like clay, plaster, etc. This project allowed students to make something 3D and introduced simple origami folds. I pre-cut 2 inch squares in a variety of colors for my students. I used colored printer paper from the office rather than construction paper because it's so much easier to fold. My only rules were that it needed to have radial symmetry and, of course, craftsmanship!

Here are the folding steps:
Start with a square
 \
Fold into a triangle (bottom left corner to top right corner)

Fold the top layer's triangle in half: tip to bottom 

Repeat on the other side

It should look like this from above

Push the flaps down to be flat. The little triangle flaps will be where glue is placed.

These little papers should fit right into each other!

Students started gluing along either a "+" shape or an "x" shape. Some of my students were creative and came up with more complicated designs! Here are a few examples:


This last example is the same lesson, but accommodated for a student who struggles with fine-motor skills like paper folding. He was really excited once we figured out a project he could do with ease!


Monday, February 24, 2014

Tints & Shades in a Landscape

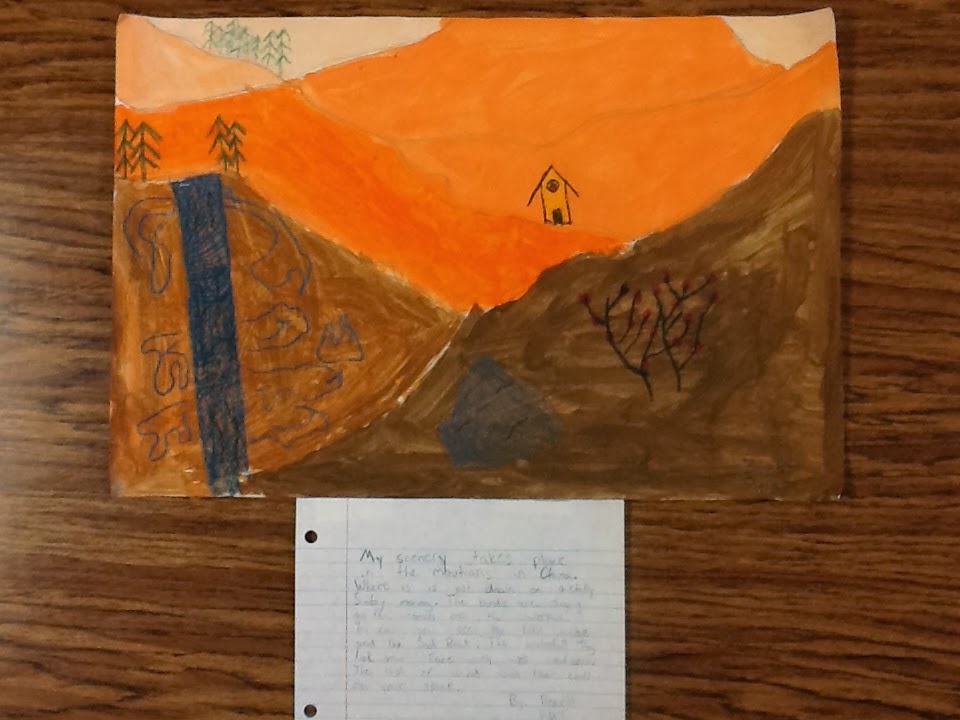
Another project I did with 4-6th grade involving tints and shades. We went over how the front layers have more detail, and how things get smaller and more faded as they are further away. Students picked out one color for their artwork and were seated with other students using those same colors. Students added details with crayon/oil pastel after the painting part. To finish, I had the students write a 6-sentence paragraph describing the scene. These turned out so nicely!

Vocabulary:
Monochromatic
Tint
Shade
Perspective
Landscape


blogger template by lovebird