Showing posts with label Shapes. Show all posts

Monday, January 14, 2013

Kindergarten Alligators

This lesson (another I borrowed from my student teaching experience) made use of the shapes students had already learned and made something BIG out of them! That's right, alligators!! The students LOVED these (and the teachers even commented on how cute they are!)


Each section was executed in a similar way. I cut strips of paper (yellow for squares and circles, green for feet) and figured out how many times they would have to be folded in order to create squares. We folded our paper together as a class. I had students cut out each square by cutting on the fold mark. The squares were glued on as is. For circles, I had students draw circles on each square.


Here is a visual for the face and teeth. I drew and photocopied the eyes/teeth paper. When I taught students how to create toes, I related it to letters (V, W) they had been learning (woo!)

My kindergartners did SUCH a good job following directions on how to glue the teeth/feet on! Their end products were even cuter than my example! But isn't that always the case?

Thursday, November 8, 2012

More Kindergarten Shapes: Organic and Shape Family

Since I am at two schools with two different schedules, a lot of my classes finish projects at different times. I am sharing a few stand-outs from my kinders/1st graders projects on organic/free-form shapes and the shape family. The creativity contained within these children is always so astounding!


This student graded her own artwork, ha!


Monday, November 5, 2012

3rd Grade Shape Resist

This is another lesson I stole from my supervising teacher during student teaching. Basically, students traced shapes onto their large sheet of paper. Students were told to overlap all of the shapes and fill the page. Some shapes should even go off the page!

Next, students color in each section (not each shape) with a different colored crayon. This means spaces that overlap are a different color than the rest of the shape. Students were told not to use black.

When students are finished coloring in their shapes, they use black watercolor to paint over the top of the entire thing.


Monday, October 15, 2012

Kindergarten: Organic/Free-form Shape

This is a fun lesson!! I do this lesson after the ovals and before the shape family. To prep for this lesson, I drew four random, squiggly shapes on a piece of paper. I cut each shape out (students receive one shape each).

Before starting the lesson, I discussed what a free-form/organic shape is. I talk about all the things that are free-form shapes (people, flowers, dogs, leaves, etc.) I then held up one of my free-form shapes and asked students what it looked like. I rotated it to see if their views changed. I did this for each of my four shapes. Students loved coming up with ideas, and it really helped stress that organic shapes can be anything!

I then handed each student a shape and had them turn it into something with their crayons. Like my previous lessons in the shape series, students cut, glued, and colored on a piece of construction paper to make a completed picture.

Here is one outstanding piece from one of my kinders! My school has empty black frames in the hallway for me to insert artworks into. This is a picture of a wolf howling in the woods! If you look closely, you can see the black lines around the wolf. That is one of the random shapes I drew on paper.


The results can be surprising! I love that this lesson gives students so much creative room!

Thursday, October 11, 2012

Kindergarten: Shape Family

This lesson allows for students to use the four main geometric shapes: square, rectangle, circle, and triangle. I borrowed this lesson from my student teaching experience!

I review the shapes with the class, pass out a paper with all four shapes, instruct students to color, cut, and glue!

After reviewing the shapes, I ask students to raise their hand and tell me an idea for how to use all the shapes together. This helps get the creativity flowing. A lot of my students did "Hickory, Dickory, Dock" in one class ; however, I did not get any pictures of these.

Here are the pictures that I managed to capture! I allowed students to pick out the color of construction paper they wished to use.


The arrow shows his dad's head rolling off. These Kinders are silly!


Kitty!


I love when I get their little hands in the pictures!!

Kindergarten: Ovals

This shape unit took up the entire nine weeks! Week 8, I did a lesson with ovals. It was a little different than the rest of the shape lessons because I had a specific picture for the students to make.

To start out, I asked students to tell me what is a shape that kind of looks like a circle. I got a few that answered "square," and one student even answered "octagon." The students answer "oval" pretty quickly though.

I then held up the sheet with the ovals on them and asked what the ovals kind of looked like. The answer was unanimous: our ovals were EGGS! I photocopied three eggs per sheet. I passed out the sheets and asked the students to color them in however they wanted. Many students wanted theirs to look like Easter eggs.

After the students finished coloring, they cut out the eggs. Each student got a blue paper.

I did not pass out glue at this point because I wanted students to draw a nest for the eggs! I instructed students to first draw a long oval (like a hot dog), then to scribble the inside so it looks like grass. Kinders love to scribble and are very confident in their scribbling abilities, ha!

I then taught the students how to draw a bird on the side of the nest. Before each part (head, body, tail, etc.) I asked students what shape that was. This served as a review over the past lessons!

Students were then told to glue their eggs on their nest. I asked students to overlap their eggs, but not all of them did this. After gluing, students finished coloring their pictures. How cute are these?!


Tuesday, October 9, 2012

Kindergarten: More Shape Lessons

Here is a compilation of some awesome results in Kindergarten. I've been working through shapes a little at a time. I thought these were so cute!!

First, take a look at the circles! I gave students a sheet of paper with four circles, had them color the circles, cut them out, glue them, and create a full picture!


I believe I already posted about the Triangles, but here are some I could not resist posting!


"Hang-gliding through the Himalayan mountains."
Seriously, so creative!


So much expression can be found in each student's piece! I am always astonished at the talent I discover in my classroom.

Monday, September 10, 2012

Kindergarten Triangles

Kindergartners FINALLY got to use their scissors in class! I pre-cut three different colors of squares and demonstrated to the students how to cut a square into TWO triangles. Not all of them get it, but that's why teachers walk around between instructions, right?!

Each student should end up with 6 triangles; however, some mess up and throw pieces away (without the teacher even seeing! Sneaky!!) The students have the freedom to make whatever they would like with their triangles.

Here is my visual demonstration on the chalkboard! I also demonstrated with scissors and a square. Students can draw a line if they choose to. Some students use gluesticks, which is the reason for the second triangle within a triangle.


I reviewed with the students how to glue (3 corners = 3 small dots of glue). Students are told to use their crayons to finish the picture after gluing down their triangles. These turned out very well!


Wow! Look at the creativity!


So many houses!!


This was a very sunshine-y day!


Some students glue their triangles back into squares.
Kindergartners love rainbows!


Another rainbow!


I'm not sure what this is supposed to be, but I LOVE it!


This student threw away half of his triangles, but his end product still turned out nicely (complete with a rainbow, of course!).

Friday, September 7, 2012

Keith Haring Figures: 4th-6th grade

I've been working on a Keith Haring project with grades 4th, 5th, and 6th. The way my classes are, I do not have any class that is completely 5th grade. The 5th graders are combined either with 4th or 6th. At one of my placements, there is a second art teacher who teaches two classes that I never even see. It's complicated to understand at first; don't stress over it!

My reasoning for explaining that first is to explain why there are only two different projects!! Both projects start out the same, but the information is put together differently for the final art project.

The first day, I displayed pictures of Keith Haring's art. I started out with the subway graffiti pictures. The students thought it was very interesting how he made his chalk drawings with other people always there watching. I showed some of his later works and talked a little bit about the Pop Shop and how he enjoyed working with children. Teachers need to take extra caution when choosing examples to display in class!!

I do my best to make art relevant to the students personally. I played a Sesame Street video (there are a lot of choices on YouTube!) that uses a wall Keith Haring painted in a gymnasium. Some students claimed to have seen it before, which is great!

I also found photographs from Google images of celebrities wearing Keith Haring's art on their clothing! The students love these photos. It really makes the artworks "cooler" to them.

 Nicki Minaj, Beyonce, Kelis and Rihanna wear Keith Haring's Art Inspired Clothes


Beyonce wears a Keith Haring necklace in her music video, Move Your Body.
I chose not to show this video in class since Beyonce is a talented, provocative dancer.
However, the video is available on YouTube for those who may choose differently!


Miranda Cosgrove (iCarly) also seems to be a fan of Keith Haring! 

After all the pictures and videos had been shared, I had students practice drawing people in Keith Haring's style. I told them that their behavior was a test for how we would spend the next class: FREEZE DANCING!

Yes, I played 80's music (or really it ended up being a mix of fun, appropriate songs from the 80's, 90's, 2000's and now). I had a table (group of four) go up and dance for the rest of the class. When I paused the music, the students froze and those sitting down picked one of the poses and drew it on their papers. Every one was required to get up and participate! Even if the student did not want to dance, I told them to pick a pose when the music stopped. The students loved this activity.

The next class, I had students pick 2-4 (the number depended on which grade) poses to use for the project. 

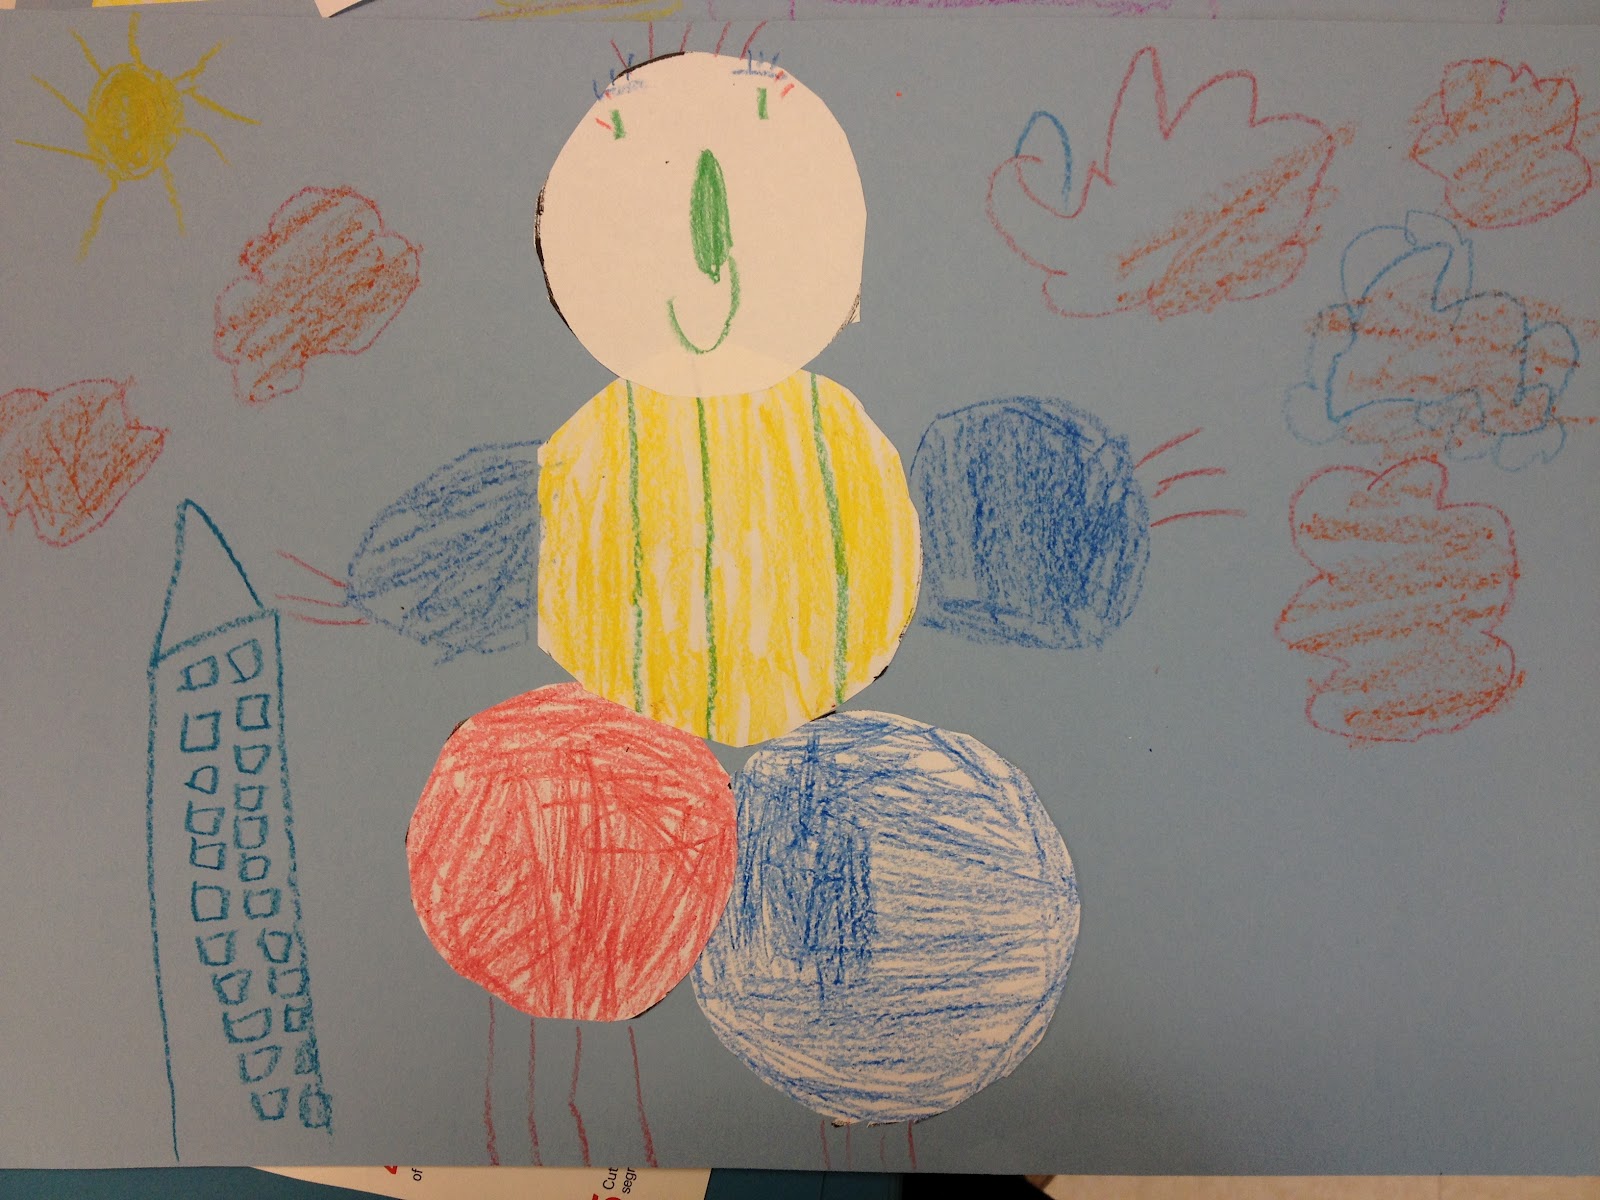
This is my example for 4th grade:
Please excuse the left side, my blue marker was kind of dry!


I had the students begin by folding their paper in half. The students were to draw one pose in the middle of each half. On one half they use cool colors, and on the other they use warm colors!! I demonstrated how to trace around the figures using my Elmo. I felt so encouraged when they begged to stay in art class! They love this project! I found this idea here: http://ourartlately.blogspot.com

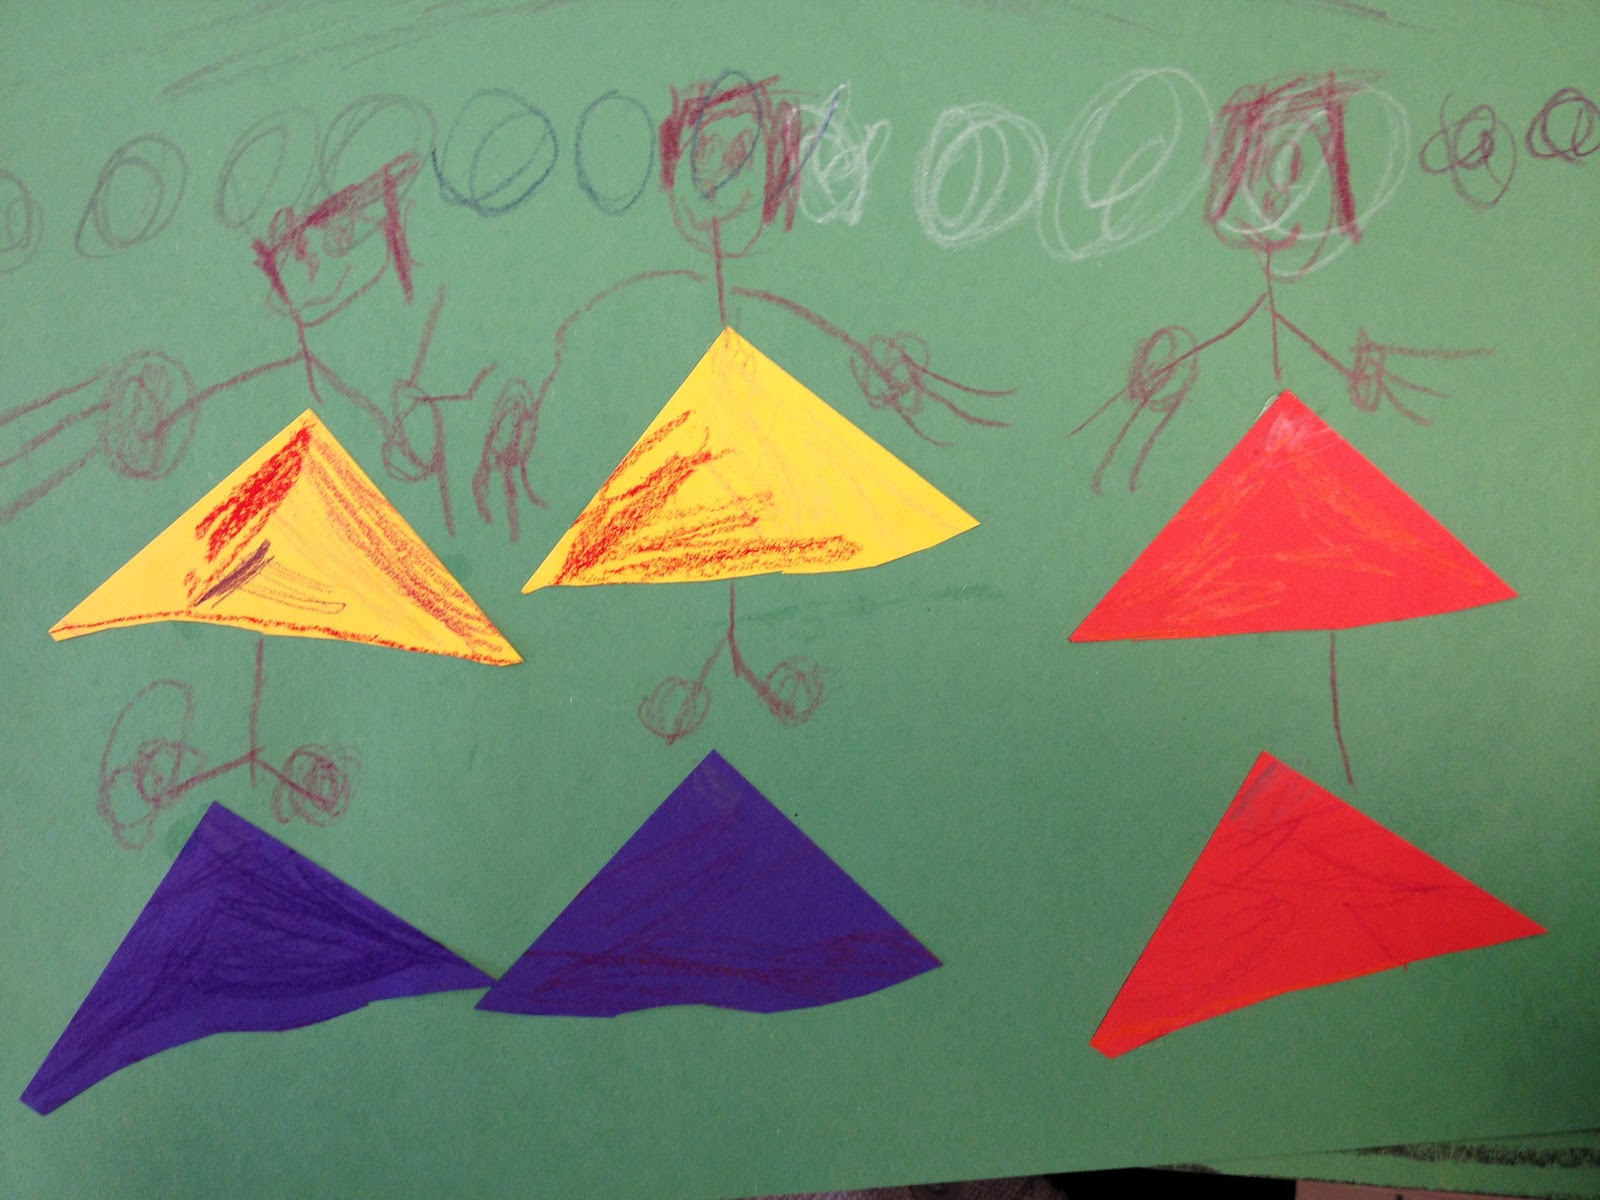
This is my example for 6th grade:


I instructed students to fold their paper into fourths (I demonstrated this for them as well). I had my students color the sections in with markers, while in my example I glued paper down instead. The students receive one color of paper (cut down to size!) and are to draw one of the figures they selected on it. I really push for them to draw them large because 1. it looks better and 2. it's easier to cut!

Students raised their hand when they had finished the first figure. I checked it and either gave constructive criticism, i.e. draw the legs/arms thicker, or gave out the other three colors. Students cut out the figures and glue them on a section with a different background color. The students trace around the figures with black marker and add motion lines. I was inspired to do this lesson while visiting this blog: http://dalimoustache.blogspot.com

I'm excited because both of these projects will look amazing hanging up in the hall!! The students all seem to remember the artists name! I will post student examples when they are all done!


blogger template by lovebird