Tuesday, February 19, 2013

2nd Grade - Formal Balance/Symmetry Butterflies

I used butterflies to teach symmetry/formal balance to my second graders!

Here are the steps! We did this over the course of 2-3 days:

  1. Fold 12x18 white paper in half like a card.
  2. Draw half of a butterfly.
  3. Trace in oil pastel.
  4. Fold so that the drawing is on the inside.
  5. Rub over drawing with a craft stick - the oil pastel will transfer to the other side.
  6. Open up and trace over the transferred oil pastel.
  7. Watercolor - make sure students know to make it the same on both sides!
  8. Cut out and glue to a piece of colored construction paper.


1st grade - Knowing Our Colors & Creating Peacocks

While this may not be the best picture, I think you can get the idea. I used peacocks to teach colors to my 1st graders. We had just finished watching a video series on colors (complete with color worksheets!) and I need a project to apply some of these concepts.


Day 1 - After handing out their completed worksheets, I gave students a 12x18 sheet of paper. I had students fold their papers in half like a card. I instructed students to color primary colors on one half and secondary colors on the other - front and back. Some students, like the one pictured above, just colored in blocks. Others opted for more complicated designs and pictures.

Day 2 - I printed out a peacock template on card-stock paper. I told students to color in their peacock body using ONLY cool colors (we reviewed what these are). After coloring, students cut out the peacock and did the other side. When they finished, I had them bring the peacock to me. I cut a slot in the body of each peacock.

Day 3 - I taught my first graders to fan-fold! The 12x18 papers are folded so that they are TALL. At first, I told students to put it through the slot themselves, but many had issues doing that. So I had students bring their peacock and fan-fold paper up to me. I put the fan fold through the slot and stapled it once at the top. Ta-Da!!

They LOVED these peacocks!!


3rd Grade - Laurel Burch Cats


This is my all time favorite lesson, and not just because I am definitely a cat lady. This lesson always produces BEAUTIFUL results. I split it up into four days:

Day 1 - Introduce the artist - Laurel Burch! Students love her colorful cats.

This is the day I demonstrate how to draw the cat. The students draw along with me. Sometimes, I have papers with the different steps on them that I will put up on the board in case students fall behind.

Students also are to add a lot of patterns to their kitties!! They then trace their pencil lines with permanent marker.

Students may use CRAYON to color the kitties in. I emphasize that they need to color darkly in order for the crayon to show up later. Oil pastel would work to, but my students always end up smearing them all over the place!

**It is important to remind students not to color in their entire cat, JUST the patterns!

Day 2 -

This day I have students start on their frames. Many students are not quite done with the patterns on their cats, so I don't want to force them to paint yet. I tell students to pick a color of paper and make a frame/border using more patterns and a lot of colors! Students that are behind start on their frame after they finish color their cat.

Day 3 - TIME TO PAINT! I go through the first "rainbow" of watercolor with my students, then allow them to paint it on their own, continuing the pattern. Students can paint over the lines of their cats since we will cut them out later.

When students finish, they bring them to the drying rack and work some more on their frames (if they need to).

Day 4 - This day creates a TON of paper scraps. Students have three things to make or cut: a rug, a mouse, and their cat. I cut small rectangles of paper OR put the scrap paper box at the front of the room for students to use as rugs. I also cut small squares for mice. A lot of students don't know how to draw a mouse, so I put a step-by-step on the board for them.

Students glue down in this order:

  1. Rug - towards the bottom of the paper
  2. Cat - sitting on the rug
  3. Mouse - at the cat's feet
My students love their final products and are always antsy to take them home!!

2nd Grade - Cubist Autumn Leaves

Wow, I definitely forgot to post this lesson! Although, I suppose this lesson could also be done with flowers. Here is my example:


Here are my basic steps:

1. Introduce Cubism (Picasso)
2. Have students draw different kinds of leaves - I project a picture of leaves on the screen for students to look off of.
3. As a class, split up the paper into sections using a ruler. We split ours into EIGHT sections. 
4. Have students go over their pencil lines in permanent marker.
5. Talk about Warm Colors vs. Cool Colors.
6.  Demonstrate how to color in the leaves using warm colors.

And that's pretty much it. I should have posted this months ago!

Monday, January 14, 2013

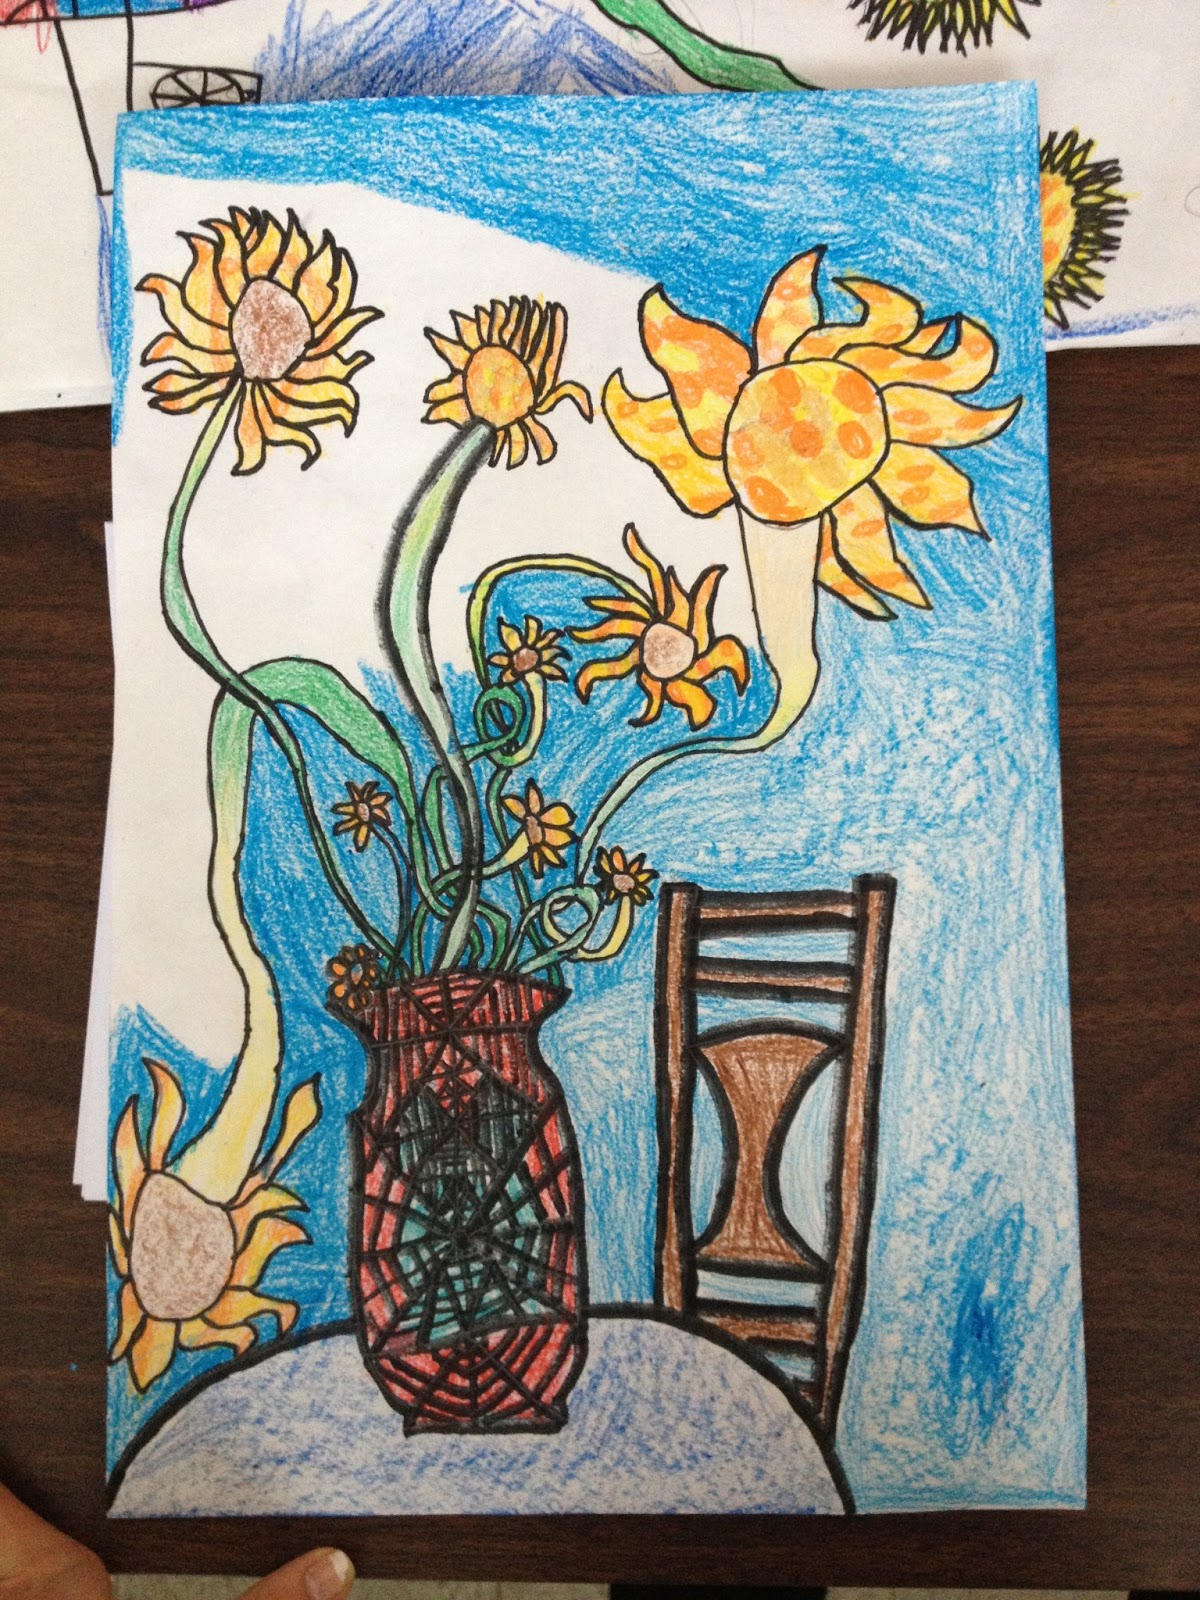
4th Grade Sunflowers in the style of Van Gogh

I attempted to teach a really awesome lesson on Vincent Van Gogh's sunflowers. I even showed a clip of Doctor Who's "Vincent and the Doctor" (which is pretty awesome, by the way). My students seemed really into it!!

...but...well, this lesson kind of flopped. I think my students got too bored with it. I was REALLY discouraged, but then a few students really pulled through! I mean, these sunflowers are gorgeous!!


I had asked the students to color in their pictures using dots only. I realized a little too late that the papers were a little big for that. It would have been easier (maybe) to use paint, but I only have this class for 25 minutes!! At my other school, I tried using paint and oil pastels, but the classes that used crayons honestly turned out much better than the other ones. Trial and error. I really like this first one (^) and how the white spaces make it look even more like Van Gogh's style!


Another one that turned out well! This student colored in, then added dots on top. A great approach really.


Many of my students decided to stop doing dots after the petals were done. I ended up having to grade these differently than I had originally planned. This lesson definitely needs some adjustment. Feel free to post any suggestions for future reference!

Kindergarten Alligators

This lesson (another I borrowed from my student teaching experience) made use of the shapes students had already learned and made something BIG out of them! That's right, alligators!! The students LOVED these (and the teachers even commented on how cute they are!)


Each section was executed in a similar way. I cut strips of paper (yellow for squares and circles, green for feet) and figured out how many times they would have to be folded in order to create squares. We folded our paper together as a class. I had students cut out each square by cutting on the fold mark. The squares were glued on as is. For circles, I had students draw circles on each square.


Here is a visual for the face and teeth. I drew and photocopied the eyes/teeth paper. When I taught students how to create toes, I related it to letters (V, W) they had been learning (woo!)

My kindergartners did SUCH a good job following directions on how to glue the teeth/feet on! Their end products were even cuter than my example! But isn't that always the case?

2nd Grade Dutch Cities

For a free draw before (while students were finishing up) I assigned students to draw a gingerbread house. I don't know if anyone else has noticed, but gingerbread houses look a lot like Dutch architecture! This is what inspired the Dutch City project.

I showed students pictures of Dutch buildings and talked about how their roofs looked, windows, etc. I also emphasized how close together the buildings are. They really seemed to like the buildings, especially after we connected them to gingerbread houses. After we finished the project, one of my students even brought in a picture of Dutch architecture which he tore out of a magazine. Hooray!


For the project, I cut 12x18 sheets of paper in half (6x18). This provided a long, skinny piece of paper. I had students use their pencils to draw buildings with crazy roofs, lots of windows, etc. with walls super close together. Students then traced their lines with permanent marker (not crayola marker!)

Students colored in their buildings however they liked with crayons. The only parts students were NOT to color in were the sky and the windows. I told students to press kind of hard with their crayons to make the colors smooth and bright.

Students used watercolor to finish these buildings! For the sky, students were to use both blue and purple. Some of the skies look pretty amazing! Students painted the windows in yellow.

With a class size of 36, it is hard to come up with a good project for 2nd grade!! I am very satisfied with how these turned out!


(Two students had to paint on a different day because they were not finished coloring!)


blogger template by lovebird