Pages

Tuesday, October 23, 2012

Kindergarten: Types of Line

I got the idea for this lesson while browsing through the art teacher tag on Instagram. When I see an idea I want to use, I take a screenshot and save it for later. This is the first one that I have I put to use!

This lesson does require some prep, unless you honestly expect kindergartners to be able to use a ruler properly. I used scrap paper from another project. I had cut four inches off of paper for another grade and was left with these 4x12 inch slices of paper. On the short sides of the paper, I picked a width and marked it with lines that would later be connected by my students. This is important so all of the lines will fit next to one another and form one, larger line.


I used a method I learned in printmaking class to mark the papers more quickly.


I started the lesson by asking the students to give me a definition of a line. This discussion guided the class to talking about different types of line. I had a half sheet of computer paper that I put each type of line on, i.e. zig-zag, curvy, wavy, thick, thin, etc.

I then demonstrated the project for the students while they watched around my table.
  1. With a black crayon, connect the top dashes with a crazy line.
  2. With a black crayon, connect the bottom dashes with a crazy line.
  3. Color inside the black lines (the middle) with a black crayon.
  4. Use all the other colors on the top and bottom! Make it random, not a "picture."
I demonstrated ALL of the steps for the students until it was through, emphasizing that they needed to color neatly, only use black on the line, etc.

I had students go back to their seats and passed out the papers with the front side down. I instructed students to write their names on the side I put down for them. I then vocally walked the students through all of the steps again. It may be necessary to walk around the room and help some with the line part. A lot of students don't want to color between the dashes, connect the dashes, etc.

As the students finished, I had them bring their lines to me at the back table. I put two pieces of masking tape on the back of their lines, and connected them all on the wall! I wrote the teacher's name on the inside of my line and put it at the very end. The students loved pointing out where their lines were. I'd say it was a pretty successful project.


Monday, October 15, 2012

Kindergarten: Organic/Free-form Shape

This is a fun lesson!! I do this lesson after the ovals and before the shape family. To prep for this lesson, I drew four random, squiggly shapes on a piece of paper. I cut each shape out (students receive one shape each).

Before starting the lesson, I discussed what a free-form/organic shape is. I talk about all the things that are free-form shapes (people, flowers, dogs, leaves, etc.) I then held up one of my free-form shapes and asked students what it looked like. I rotated it to see if their views changed. I did this for each of my four shapes. Students loved coming up with ideas, and it really helped stress that organic shapes can be anything!

I then handed each student a shape and had them turn it into something with their crayons. Like my previous lessons in the shape series, students cut, glued, and colored on a piece of construction paper to make a completed picture.

Here is one outstanding piece from one of my kinders! My school has empty black frames in the hallway for me to insert artworks into. This is a picture of a wolf howling in the woods! If you look closely, you can see the black lines around the wolf. That is one of the random shapes I drew on paper.


The results can be surprising! I love that this lesson gives students so much creative room!

Thursday, October 11, 2012

Kindergarten: Shape Family

This lesson allows for students to use the four main geometric shapes: square, rectangle, circle, and triangle. I borrowed this lesson from my student teaching experience!

I review the shapes with the class, pass out a paper with all four shapes, instruct students to color, cut, and glue!

After reviewing the shapes, I ask students to raise their hand and tell me an idea for how to use all the shapes together. This helps get the creativity flowing. A lot of my students did "Hickory, Dickory, Dock" in one class ; however, I did not get any pictures of these.

Here are the pictures that I managed to capture! I allowed students to pick out the color of construction paper they wished to use.


The arrow shows his dad's head rolling off. These Kinders are silly!


Kitty!


I love when I get their little hands in the pictures!!

Kindergarten: Ovals

This shape unit took up the entire nine weeks! Week 8, I did a lesson with ovals. It was a little different than the rest of the shape lessons because I had a specific picture for the students to make.

To start out, I asked students to tell me what is a shape that kind of looks like a circle. I got a few that answered "square," and one student even answered "octagon." The students answer "oval" pretty quickly though.

I then held up the sheet with the ovals on them and asked what the ovals kind of looked like. The answer was unanimous: our ovals were EGGS! I photocopied three eggs per sheet. I passed out the sheets and asked the students to color them in however they wanted. Many students wanted theirs to look like Easter eggs.

After the students finished coloring, they cut out the eggs. Each student got a blue paper.

I did not pass out glue at this point because I wanted students to draw a nest for the eggs! I instructed students to first draw a long oval (like a hot dog), then to scribble the inside so it looks like grass. Kinders love to scribble and are very confident in their scribbling abilities, ha!

I then taught the students how to draw a bird on the side of the nest. Before each part (head, body, tail, etc.) I asked students what shape that was. This served as a review over the past lessons!

Students were then told to glue their eggs on their nest. I asked students to overlap their eggs, but not all of them did this. After gluing, students finished coloring their pictures. How cute are these?!


2nd Grade: Autumn Trees

What better way to bring in the fall than with a project about the trees and their autumn leaves?!

I started this lesson out by passing out a piece of construction paper. I told students to pick a crayon: brown, tan, gray, black, etc. On the board I demonstrated how to draw a tree as the students did each step along with me.

1. Draw two parallel, vertical lines that go from the bottom to about the middle of the page.

2. Curve the lines outwards, away from each other

3. Use "V's" to create lots of branches.

Obviously, I am not going into too much detail on here since I'm sure other art teachers already know how to draw a tree!! If not, there are many tutorials online.

For the tissue paper, I used red, orange, and yellow. Each student was to use all three of these colors. I only instructed students to put leaves around the bottom of the tree and on the branches of the tree. Some students, however, wanted to make falling leaves. This I allowed. Any time that a students wants to be creative with their art, my heart leaps with joy and I nearly shout "YES, DO THAT!"

Here are the steps for applying tissue paper:

1. Rip off a small piece of tissue paper.

2. put a pencil (eraser end) down in the middle of the ripped tissue.

3. crinkle the excess tissue up, around the pencil. Hold it like that.

4. Put a dot of glue where you want the "leaf" to go.

5. Push the tissue/pencil down onto the glue, let go, and lift up! Don't flatten the tissue!!

These turn out REALLY nice. I did these with my students during student teaching. It's definitely a lesson I want to keep doing!


Here are the final products displayed in the hallway!!
Some students added tire swings, birds, etc. I love them all!


Close-up view!
Aren't these great?!

Tuesday, October 9, 2012

2nd Grade: Mondrian Lines & Color Blocks

I showed third grade examples of Piet Mondrian's work, as well as a clip from this episode of Arthur. Binky, one of the characters, is proven to be an "expert" on art when he uncovers that Mondrian's work is hung the wrong way!

I also show students examples of things that have utilized Mondrian's works:


This lesson deals with vertical and horizontal lines. I go over the definition of these words with the students. Each student is handed a ruler. I then instruct students, on their papers, to draw three vertical lines and two horizontal lines.  From there, students are to add their own lines. My only guidelines are that the lines must ONLY be vertical and horizontal. The lines must also start and end at either another line or the edge of the page.

The next step is for students to trace over their lines with a black crayon. After finishing this, students fill in each block with a color. Unlike Mondrian's work, students are not permitted to use the same color in two blocks adjacent to one another.

Here are a few examples. I did not take picture of the entire class's since they all look pretty similar! They are VERY colorful though!


Keith Haring: 4/5th Grade

Here are some of the finished works from 4/5th grade! This project took WAY longer than I expected. Most of the students are still working towards finishing! They look really awesome though.


Aren't these cool?! I can tell my students are very proud of themselves, as they should be!

3rd Grade: Underwater Scratchboards

With the third grade, I did two scratchboard projects. The first one we used crayons on tagboard. Students were to press hard with the crayons and create vertical lines. I told students to use any color but black. After the vertical lines were finished, students used black to cover everything up. We used wooden, pointed sticks to scratch different types of lines into the black and the colorful under-coloring was revealed!!

That lesson lasted a week. It served as a warm up for a bigger, more exciting scratchboard lesson that lasted two weeks.

Day 1: Students color vertical lines in rainbow order on a piece of tagboard. Our tagboard was cut to the size of about half a sheet of paper. Like before, students were to press hard with the crayons. I listed rainbow order on the chalkboard and included pink. (25 minutes)

During a prep period, I painted black tempera mixed with hand soap over the top of the colored tagboard. It is very important that students remember to write their names. Once they are painted, they are indistinguishable!


Day 2: I displayed about 20 pictures of fish/underwater life. I handed out computer/free draw paper and had students draw ONE creature from each photo unless stated otherwise. I explained that they would use these drawings on their scratchboards. Students were told they would not have to use every fish/creature they drew, just the ones that they liked best. (50 minutes)

Day 3: I gave students scrap paper the same size as the scratchboard and told them to draw what they were going to put on their scratchboards. I stressed to have some big creatures, medium creatures, and small creatures. I showed my students an example (that I did myself!) to further explain what I meant. Students also were told to put a lot of patterns on their fish and other sea animals. (25 minutes).


Day 4: Finally, students were able to scratch their pictures!! I laid down newspaper, as this can get messy. Here are the results from two of my third grade classes!!


Beautiful, expressive results!!

Chicka Chicka, Boom Boom: Letters with 1st Grade

This is a lesson I borrowed from my student teaching experience. On YouTube, I found the Scholastic video "Chicka Chicka, Boom Boom." I had students watch the video and ask them to pay close attention to the way the letters move.

After watching the video, I handed out paper to the students. I demonstrated how to turn a letter into something different, i.e. an H into a horse. I then had students draw the first letter of their name and turn it into something.

I feel like this may have been more successful if we had first done one all together, but I only have 25 minutes with 1st grade at the school I've taught this. Sad! Here are a few great examples!


C into Cat


T into a Table with an umbrella!


O into an Egg in a bird's nest.

Kindergarten: More Shape Lessons

Here is a compilation of some awesome results in Kindergarten. I've been working through shapes a little at a time. I thought these were so cute!!

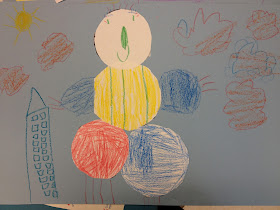
First, take a look at the circles! I gave students a sheet of paper with four circles, had them color the circles, cut them out, glue them, and create a full picture!


I believe I already posted about the Triangles, but here are some I could not resist posting!


"Hang-gliding through the Himalayan mountains."
Seriously, so creative!


So much expression can be found in each student's piece! I am always astonished at the talent I discover in my classroom.

1st Grade Dogs: Finished!

My first graders did a step-by-step how to draw a dog with me. We also used tempera paint to create a very simple background. 1st graders then cut out their dogs, glued them, and used oil pastels to finish the picture. The results are "pawsitively" precious! Check it out!


Here is a close up!


And finally, all the dogs on display. Aren't my 1st graders talented?!